Black and White Image With One Full Colour Object Using Photoshop
Continued from Page 1
A very dramatic effect for images is the process of converting the image to black and white and keeping one prominent object in full colour. This process is very simple using Photoshop but care must be taken otherwise the object can appear cut out and stuck on the black and white back ground. The starting image is on the left and the final image is on the right.
Click on refine edges feature at the top of the screen:

Adjust the feather value. A low value will produce a very sharp edge to the object and make it appear that it was cut out. For most images I suggest a value of between 2-5px. It is best to try different values at this stage to find the optimum for your image. If the preview radio button is selected the image will alter in real time.

When the correct feather level has been obtained click on ok. Right click on the selected area of the object. Select copy to new layer

High light the original imagel layer in the “layer window”

Select the "Black and White adjustment from the adjustment level of the image tab.

In the black and white window select live preview. Adjust the intensity levels or use one of the default presets.

Check that you are able to see both layers in the layers window.
 |
 |
 |
Your finished image is completed. I always suggested repeating the feather and the black and white levels to optimise the picture. Use the history feature to return to a previous stage.
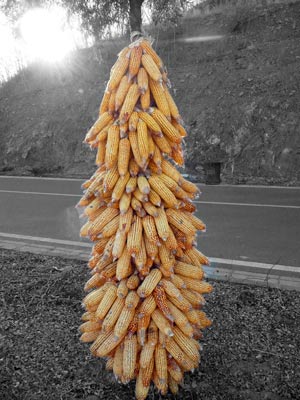
Finished black and image with a coloured object
Page 1 - Page 2
Related Pages and Possibly Useful Guides