
Welcome to Help Computer Guides
Welcome to HelpComputerGuides, trusted informative guides for your everyday
How to use Stencil for marketing campaigns
Written by: Darren Hignett
In this section, we will quickly go through how Stencil works. The features covered are similar on other apps such as Canva and Pro tips are also included to help you create even better visuals. When you sign up for an account, Stencil offers a quick tour of the app and it’s worth spending just a few minutes going through this as it complements the information and tips below.
Note: On this page, we use Stencil to demonstrate how to achieve what you are looking for. You can find out more about Stencil here.
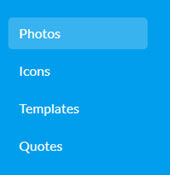
Adding elements to the canvas
You can add a range of elements to the canvas including stock images, icons, saved images and your logo. To add an element to your canvas simply navigate to the element that you want to add and click on it.
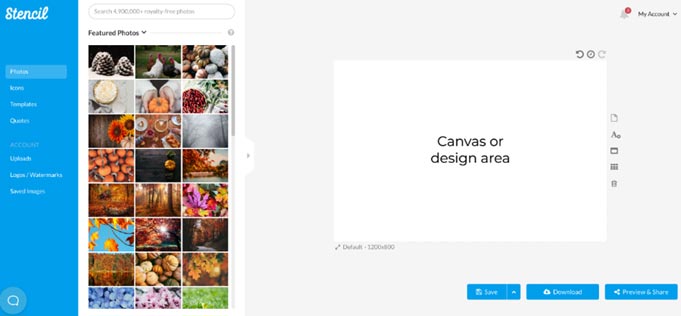
We will cover the various elements and how to add them to your canvas before showing you how to do some clever stuff in more detail.
Design Tip! When the canvas is blank, double click anywhere on it to insert text. A text box will immediately appear where you have double clicked!
Adding Photos
On the left-hand side, click on ‘Photos’. Here you can access over 4 million images for use in your design. Many of the photos have been grouped together into categories such as Animals, Business and Buildings, and you can view all the photos under each group by clicking the down arrow and selecting the group.
Alternatively, you can search based on keywords. If you want pictures of a smiling couple, then all you have to do is type ‘smiling couple’ into the search box. Similarly, you might be looking for pictures for a festive holidays post that you plan to create. Just typing words such as ‘festive holidays’, ‘Santa’ or ‘gifts’ will return photos that you can add to your design and use for free.
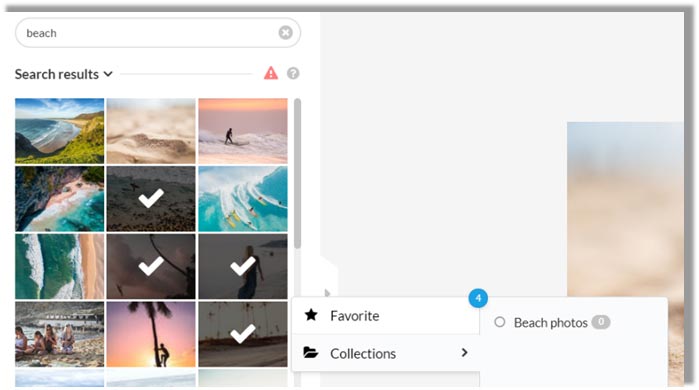
When you hover over an image with the mouse, some options will appear to help you further. The star icon that appears on the bottom right of the image allows you to add that photo to your favorites.
If you are using the same photo regularly then adding it to your favorites allows you to quickly access that photo again without having to remember how you found it the first time (if you think trying to remember where you left your keys is bad, try finding an image you liked from among 4 million other photos!).
With so many free photos available, this option is very useful. You don’t need to spend time trying to find the right image using a keyword search, just add the image to your favorites!
When hovering over an image, an icon with three bars appears in the top right corner of the photo. Clicking on this gives you several options including ways you can add the photo to your canvas. We won’t go through the first three options here but one feature that’s worth noting is Collections.
Instead of hovering over the image, you can right click on the image. This immediately brings up the menu.
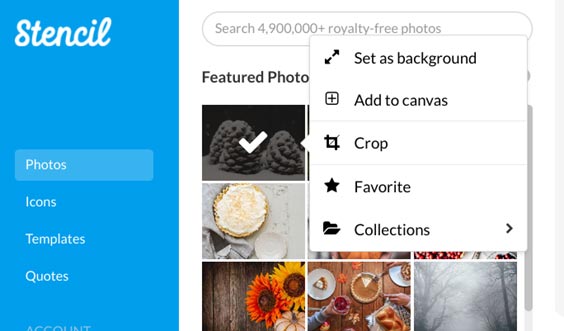
If you are likely to favorite a lot of photos, then a better way to manage them is to add them to Collections. You can set up your own Collections and add photos to them. The next time you are looking for a photo that’s related to a keyword such as ‘Summer’ or ‘woodland images’ then set up Collections using these names (Summer Collections, Woodland images Collections etc) and add the photos you like the most.
Spending just a few seconds to add a photo to a Collection could save you hours in the future – and help ensure you have great looking artwork with the right photos included!
Insight: If you would like more advice for creating effective Facebook ads then you might find this blog post with Tips for using Facebook Ads of interest.
Pro Tip! Use Collections to store the best photos that you would like to use for various campaigns so that you can access them quickly. On a Windows laptop you can also select multiple pictures by keeping your finger on the CTRL button while clicking on the pictures. When you have selected the pictures you want, right click and select the Collection you would like to add the photos to!
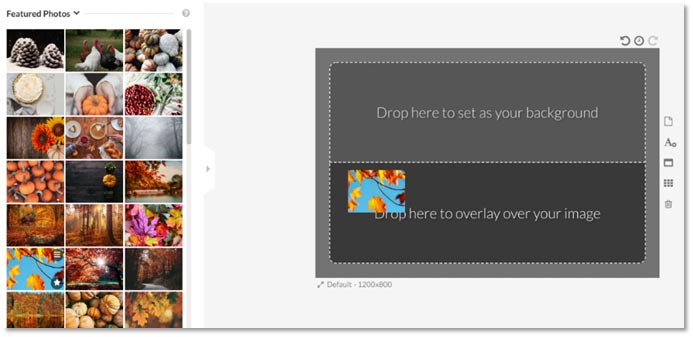
To add the photo to your canvas, simply click on that photo and it will be added instantly as a background image. Your design (the canvas area) consists of either a background image or color and other elements that you add will then sit on top (or overlay) that background.
You might not want to add the photo as a background image. Instead, you can add it to your design as an overlay image, which you can then resize and position where you want it (more on design suggestions later). To add the photo as an overlay, simply click on the photo and drag it to the canvas. Make sure to drop it into the area that appears with the words ‘Drop here to overlay over your image’.
Adding your own uploads to the canvas works in the same way but there is a small difference worth noting. When adding Photos from the library, clicking on the photo will add it as the main background image but if you click on an image that you have added to the Uploads area then it will overlay the image on the canvas. This subtle difference is designed to speed up design work based on how most people use photos versus their own uploads.
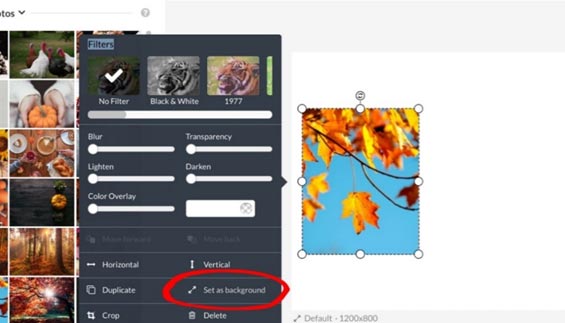
If you add an image, either as an overlay or a background image, but change your mind, don’t panic!
It’s easy to change it by clicking on the element in the design area and selecting either ‘make resizable image’ or ‘set as background’.
Importing images
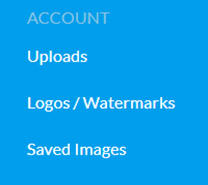
On the left-hand side, under ‘Account’ click on Uploads. Here you can upload and manage your own images and select them for positioning on the canvas. Once you have some images uploaded, you can then group them into Collections just like you can with Photos.
Collections could be based around themes or groups such as product type, special events or seasons of the year.
Pro Tip! You don’t have to visit the Uploads section to upload an image. Simply drag and drop an image from your desktop onto the tab that you have Stencil loaded on, and the image will automatically upload. You can also copy an image from another tab using the following instructions…
Copy and paste upload: If you have an image open in a tab (not a webpage, but just the image itself), you can copy it to your clipboard by pressing Command + C (or right-clicking on the image and choosing the Copy Image option). You can then paste the image right into Stencil by pressing Command + V. This will upload the image from your clipboard right into Stencil, and it will appear in the Uploads section.
When hovering over an image that you have uploaded, icons appear with options for managing that image including adding them to Collections and cropping or deleting the image. This is similar to the Photos section but with a few slightly different options, one of which is to move or re-order your uploads.
If you click on the Direction icon in the top left corner, you can drag and re-order your images. This is useful if you want to keep similar images together. To do this, keep your finger on the mouse button while you drag the image to its new location.
To save time, I don’t recommend spending too much time re-ordering uploads, especially as your library of uploads grows! It’s much easier to add images to Collections so that you can instantly see images that are grouped together.
You can also select multiple images and add them to a single Collection. Once you have uploaded the images, keep the CTRL button pressed while you select the uploaded images. Then right click on your mouse and add the uploads to the Collection you want.
Pro Tip! Use the Import images option (under the Upload Images area) to import images from other areas such as your Facebook or Instagram feed or an external URL. This allows you to re-use artwork and even make improvements if necessary.
One last thing worth knowing about Stencil and the way it manages your artwork. I currently have over 8,000 images that I have created for myself and my customers that are stored on Stencil. In the beginning it was easy managing them but, as my library of work grew, it became harder to find previous work that I wanted to re-use.
Even after adding my work to different Collections, it was still hard sometimes trying to find that one image I had created for a specific customer or campaign. But then Stencil launched a great feature that made my life so much easier…
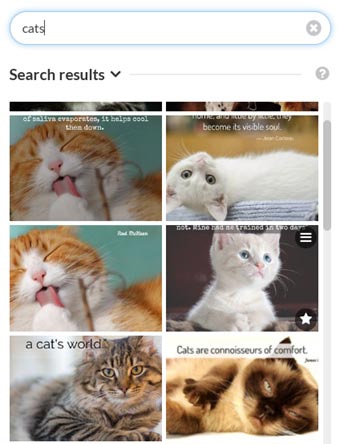
Stencil has the ability to search for images that contain certain wording or based on the name of the stock image that was used. If, for example, you created an image wishing people a Happy New Year 5 years ago and you’ve saved hundreds of images since then, you don’t need to scroll through the images or try to work out which Collection you added it to (if you did at all!).
All you have to do is type something like ‘New Year’ into the search box and it will retrieve all your posts containing the words ‘New Year’ as well as any images that are tagged with that wording.
As you can see below, I’ve created quite a few images over the years of cats! But then again, they are cute, and everybody loves them, right?
Note: Stencil isn’t able to track keywords for images if you have uploaded them, so this isn’t a precise tool when it comes to searching for image types that you have used, but the ability to search based on what you have used from the Photos section as well as from the words you have used is still very powerful.
It might not seem like a big thing if you are starting out, but even after you have created images over a few months, you will start to find it useful. I still recommend using Collections but just be aware that you don’t need to waste time re-ordering your images or saving them to folders on your PC based on categories (do I put the happy birthday post with a cat on it in the cat folder or the celebrations folder… sigh).
Adding Icons
Adding Icons is similar to Photos. You can’t upload or import Photos or Icons but there’s no need to as Stencil includes a large library of both, and you can search for the right Icon or photo using the search feature.
Adding Icons is a great way to add to artwork and to give it more of a personal or fun touch. You can also make designs look more professional by adding icons such as a Facebook or Twitter logo.
Here are some great ideas for how you can use Icons in your design work:
• Add a Play icon over an image to create an image that looks like a video.
• Make fun social media posts better by searching for ‘emoticons’.
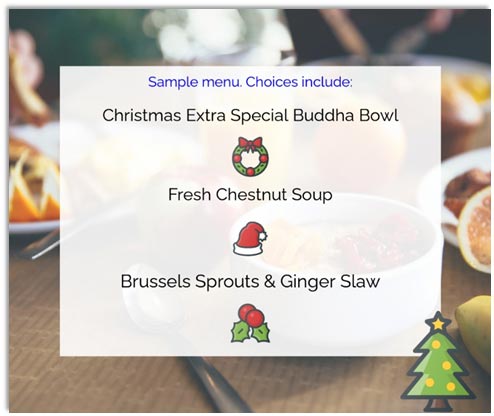
• Make seasonal posts special with Icons of pumpkins and ghosts at Halloween and snowflakes or Christmas trees in December (see example festive menu image below).
• Add a calendar Icon and the words ‘Call now to book an appointment’ as a call to action to your design work to increase the number of sales leads you generate.
• Add to your credibility with brand icons such as PayPal, Visa and Stripe for taking payment or eCommerce logos such as eBay and Amazon.
• Use ticks or tick boxes to highlight the benefits of what you offer in your design work.
• Add borders and lines to your design so that they stand out.
You might be feeling overwhelmed with the above ideas, saying to yourself ‘these are great, but I don’t know where to start or how exactly to use them’ and that’s natural. It’s a bit like riding a bike or learning to drive a car. It seems daunting to begin with but in no time at all you will quickly learn what to do. In fact, it’s a lot easier than learning to ride a bike or drive a car – and a lot safer!
Later, we will cover templates which also use some of the above Icons. This will make creating incredible artwork even easier. Whatever next, self-driving cars?
Adding Logos and Watermarks
Great artwork deserves a great logo or watermark from a fantastic company. Imagine creating a promotional post on social media or an inspiration quote that goes viral, and the image has your logo on it. This is a great way to increase awareness of your brand and to improve the chances of generating more sales.
To add your logo or watermark, click on Logos/Watermarks in the side navigation on the left and click on Upload Logos / Watermarks.
You can upload different variations of your logo or watermark. If you have a square version of your logo, for example, and a landscape formatted version then you can include both of them and then add the right logo for the design work you are doing. Many brands also have 2 versions of logos with different colors, but that are still in line with their overall brand style. This helps to ensure logos stand out when placed on different background images and colors.
Once you have uploaded your logo or watermark, you can add it to your canvas by simply sliding the button from OFF to ON. You can also include several watermarks and logos on the same image.
Logos and watermarks will always appear on top of any other images. You can resize them and crop them as well if necessary. To crop a logo or watermark, either hover over the image, select the three bars that appear and select ‘Crop’ or you can crop it once you have added it to your canvas. To do this, add the logo or watermark and then click on it in the design area. You will then see various options including ‘Crop’.
If you click on the logo or watermark in the design area, you will also see several options to change its appearance such as Transparency, Lighten or Darken. Sometimes logos can be hard to see because of the background that they are on and, despite moving the logo around, you might find that they still don’t stand out much.
Pro Tip! Use the Darken and Lighten sliders to increase the contrast of the logo compared to the surrounding background. You might also want to add a color overlay but be careful not to dilute your brand logo and stray too far from the colors and style of your overall brand. Before doing this, it’s best to try to position the logo in a different place where there is more contrast between the colors in the logo and the background.
Adding Quotes
“A quote is a story, suspended in a sentence and treasured through time”.
~ Ryan Lilly (quote found on Stencil.com)
When it comes to social media posts, quotes can inspire and motivate potential and existing customers. They encourage engagement with your brand and are more likely to be shared… leading to an increase in your online presence.
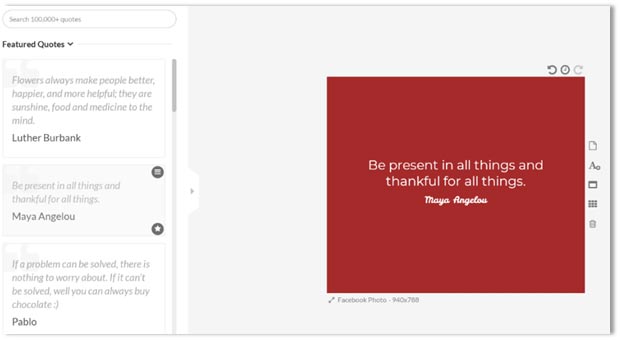
Stencil includes a library of over 100,000 quotes from famous people that you can use – as well as from people you have possibly not heard of! All you need to do is click on Quotes in the side navigation and select a quote you like. You can scroll through the various quotes by category (such as Featured, Business etc) or search based on keywords.
As soon as you click on the quote you would like to use, it will be added to your canvas, including the source of the quote. You can then change the font of the wording and create an inspirational post.
The two books listed below include ‘ready to go’ quote templates for your business. I suggest using these. You can also replace the quotes in the templates with ones from the Quotes section on Stencil, or ones you have found elsewhere.
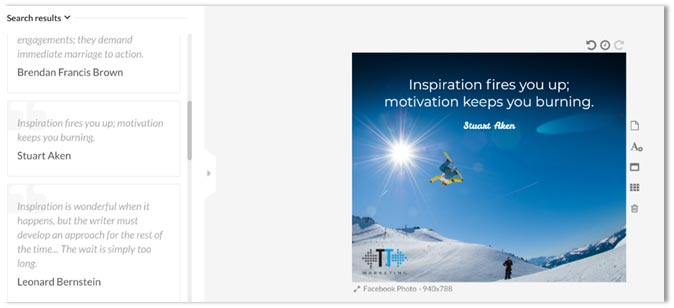
Pro Tip! To create a great quote post quickly, follow these simple steps:
1. Clear the canvas by clicking Create New Image
2. Find and add a quote by visiting the Quotes section and clicking on a quote you like
3. Add your logo (optional) by clicking on Logos/Watermarks and adding your logo
4. Click on the quote on the canvas and move it to where it looks good. Also do the same for your logo
5. Click on Photos and select a Featured photo so that it’s a background image on your canvas
6. That’s it!
In 5 or 6 simple steps, you have created an image that you can post on social media and use to generate engagement online. It might not be perfect, but you can play around with what you have created to make the wording stand out, or to find the right background image.
The example below took less than 5 minutes to do, although I did do one extra action from the above steps – I moved the wording up higher and changed the font color to white.
Using Templates
Using templates is a great way to fast track your way to successful visuals, and you can find a great range of templates by clicking on the Templates section on the left-hand side.
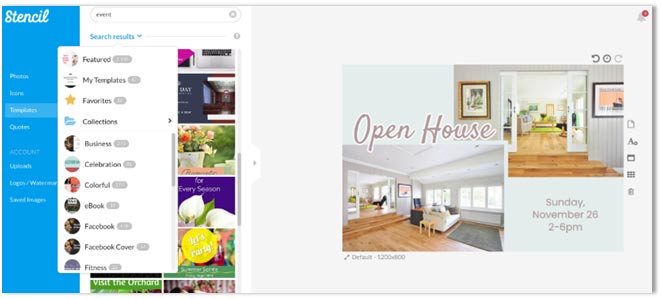
The Templates section is similar to the other sections with the ability to find templates either by searching by keywords or browsing the different categories such as Business, Celebration etc. You can also favorite the templates you like or add them to your own Collections.
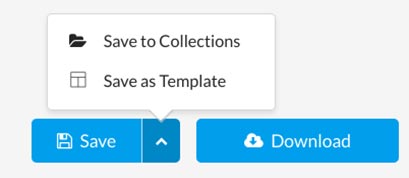
Pro Tip! Finally created that awesome image that you would like to re-use with slight modifications? You can save your own artwork as a Template and then access it by selecting My Templates in the drop-down box. To save your work as a Template, click on the up arrow next to Save (under the canvas) and select ‘Save as Template’.
Next page - How to resize an image